Affiliate Disclaimer
Some links in this article are affiliate links. We may earn a small commission if you make a purchase through these links, at no extra cost to you. We only recommend products we find useful to our readersYou must always love your body, no matter however it is. Somewhere I have heard, that health is like money, we never have a true idea of its value until we lose it. So here, are some easy yoga workout routine for flexibility in your body that you can try at home.
Yoga Workout Routine For Flexibility
1. Parivrtta Utkatasana or Revolved Chair Variation
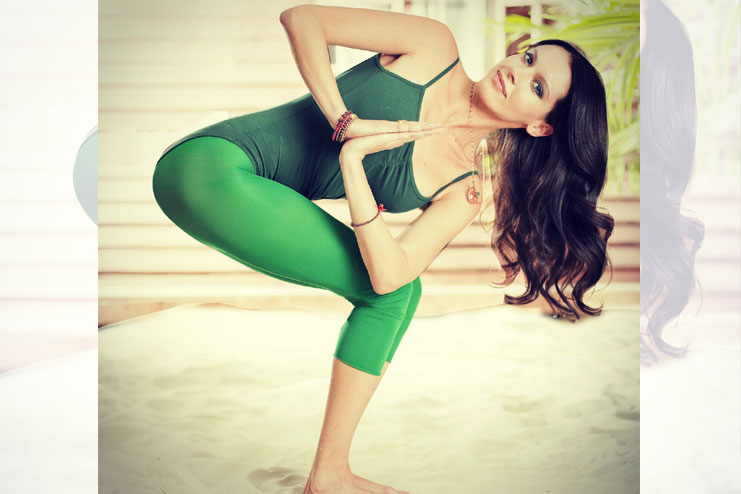
Gazing up, gently try to lean upward in a twist. This can help to open up the chest and the collarbone.
Try to hold the position for 30 seconds. Perform it on both the sides.
Note:
This pose is basically not for those people who are suffering from the insomnia, headache, low blood pressure, low back pain, shoulder injury, neck pain / dizziness or for those who have ankle or knee injury. Pregnant women also do not try to attempt this pose.
Easy Yoga At Home For Weight Loss
2. Ardha Uttanasana or Standing Half Forward Bend
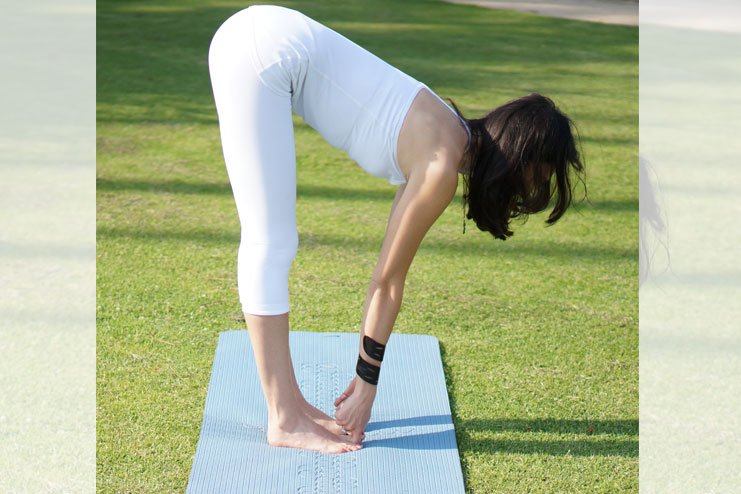
The main key point on this stretch is that the back must remain straight, and not bent. You may want actually to arch the back and pushing the butt up into the order by keeping it straight, because the back may want to bend further more down as you go.
Try to hold this posture for 30 seconds.
Note:
People who have suffered from back injuries can practice this posture with their hands, properly resting on their back of a chair or even against the wall. Keep your knees bent slightly. If you are having a neck injury, try to keep the head down, do not lift to gaze forward. Always try to work within the own range of limits as well as abilities. If you are having any medical concerns, then talk with your doctor before practicing any yoga.
3. Ustrasana or Camel Pose
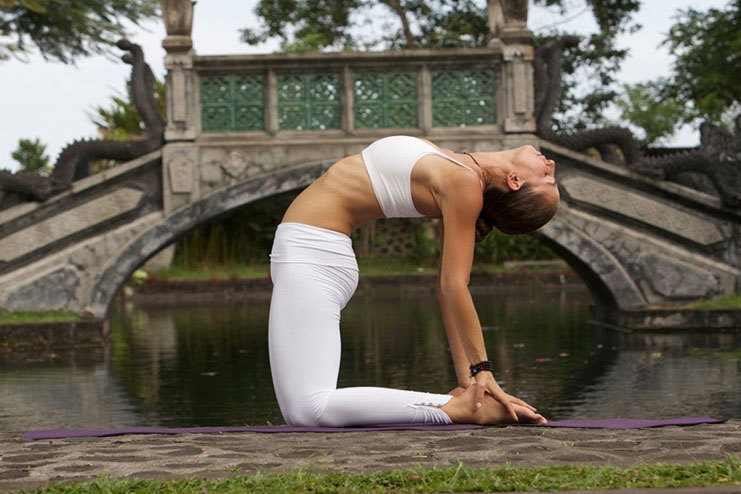
To begin this asana, first kneel to the position with the arms at the sides. Try to reach your right arm around grabbing the right ankle. Then arch the back and shift forward a little bit before you reach around, grabbing the left ankle. Be sure to keep the knees and the legs as well as the hip at a distance apart. Lean into the pelvis, arching the back even more to open the chest further.
Try to hold this pose for 30 seconds.
Note:
People who have back or neck injury, high or low blood pressure must avoid performing this pose.
4. Janu Sirsasana or Head-to-Knee Forward Bend
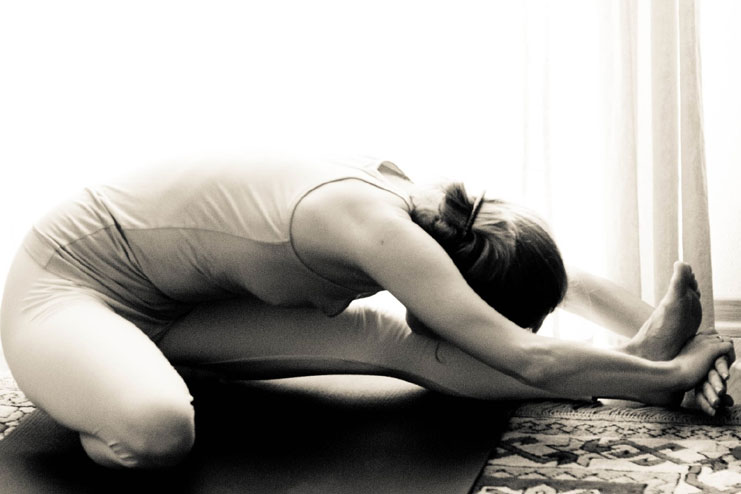
Try to hold this pose for 30 seconds. Try to perform on both the sides.
Note:
If you have asthma, or diarrhea, or if the knee is injured; do not flex the injured knee completely and try to support it on a folded blanket.
Morning Yoga Exercises For Beginners


