Affiliate Disclaimer
Some links in this article are affiliate links. We may earn a small commission if you make a purchase through these links, at no extra cost to you. We only recommend products we find useful to our readersTo burn fat we do a lot of exercises, and even diet. But how many of them really work, is the actual question to think about. Toned thighs are the dream of many women and those toned muscles really need some hard workout. Then here are some fat burning yoga workout for your thighs that you can do at the comfort of your home.
Fat Burning Yoga Workout
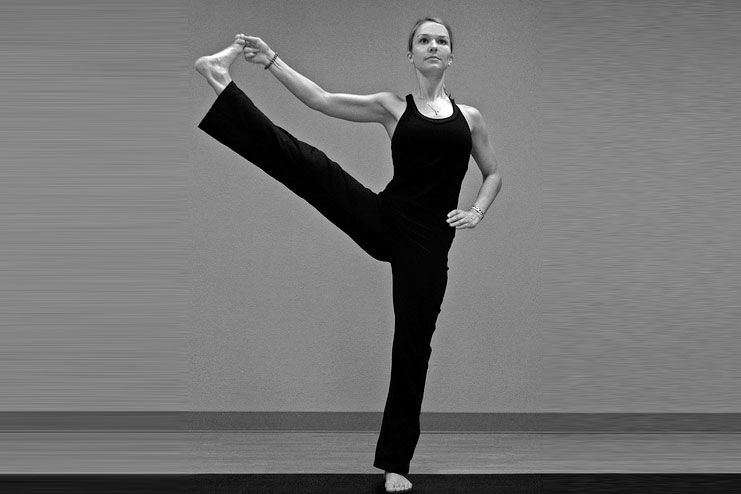
1. Extended Hand-To-Big-Toe Pose or Utthita Hasta Padangustasana
(a) It can help to strengthen your legs as well as ankles
(b) It can help to stretch the back of your legs
(c) It can help to improve the sense of balance
Steps:
(a) First stand on a pose of Tadasana, then slowly bring the left knee toward the belly.
(b) Try to reach the left arm inside your thigh, then cross it over the front of the ankle and hold it outside of the left foot. If the hamstrings are too tight, try to hold a strap that is looped around your left sole.
(c) Then firm your front thigh muscles of the standing leg, and then try to press the outer thigh in.
(d) While inhaling, try to extend the left leg forward. Straighten your knee as much as possible. If you are steady, try to swing your leg out to your side.
(e) Try to hold this pose for 30 seconds, then swing your leg back to the center while inhaling, and lower your foot on the floor with an exhale. Try to repeat this pose on the other side for a same length of time.
Contraindications and Cautions
Try to avoid this asana if you have injuries:
(a) On the ankle
(b) On low back injuries
Beginner’s Tip
You can try to hold this pose for more longer time by supporting your raised-leg foot on top of the edge of the chair back. You can set the chair an inch or two from the wall and press the raised heel firmly to the wall.
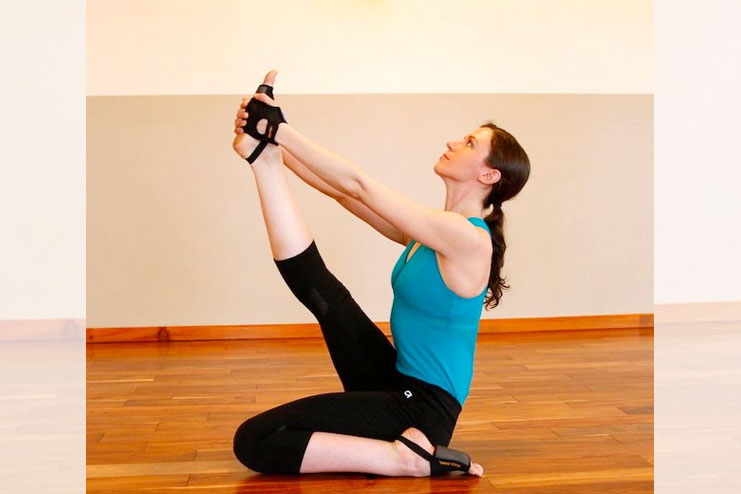
2. Heron Pose or Krounchasana
(a) It can help to stretch your hamstrings
(b) It can help to stimulate the abdominal organ and the heart
Steps:
(a) First sit in Dandasana, that is, Staff Pose. Then bring the left leg in Ardha Virasana. Try to bend the right knee and place your foot on the floor, just in the front of the right sitting bone. Then place the right arm against inside of your right leg, so that the shoulder press can be against the inner knee. Cross the hand in front of the right ankle and grasp outside of the right foot. Finally, try to grasp inside of the right foot with the left hand.
(b) Slowly lean back, but remember to keep your front torso long. Firm out the shoulder blades against the back to help in maintaining to the lift the chest. While inhaling raise your leg diagonally from the floor, angled of about 45 degrees, or with your foot as high as or even slightly higher than the head.
(c) Try to hold this pose for 30 seconds to a minute. Then while exhaling, release your raised leg. Then carefully unbend and straighten the left leg. Repeat this pose with your legs reversed for a same length of time.
Beginner’s Tip
In the beginning you might face some difficulty while doing this pose with your leg down in Ardha Virasana. Try to start your practice for this pose with your down leg into the position for Janu Sirsasana. Remember to practice virasana regularly and prepare your thighs for the full Krounchasana.
Contraindications and Cautions
(a) It can help in the pain during menstruation
(b) If you are having any serious knee or even ankle problem, then try to avoid this Ardha Virasana or half hero pose leg position.
Deepen the Pose
If you are a advanced student then you can increase this stretch on your back of your raised leg by bringing your leg and the torso together. From the pose described in step 2, try to bend the elbows sharply out to your sides, lean your torso slightly forward, and draw your leg in. Also, be sure to keep the front of your torso relatively long; do not lean forward from your belly.
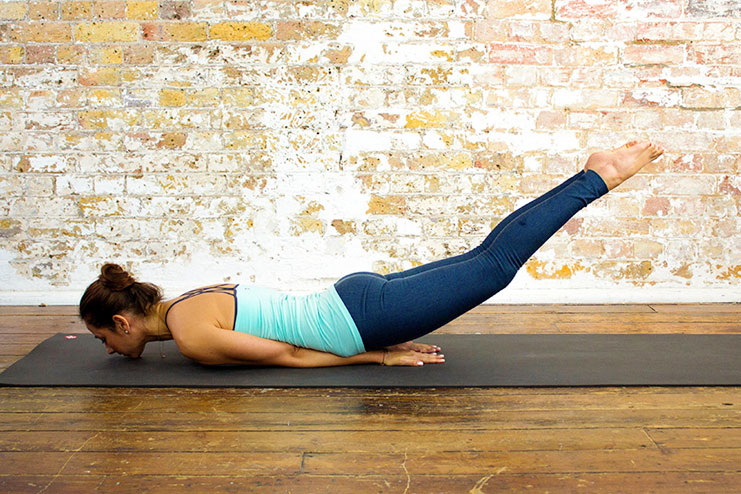
3. Locust Pose or Salabhasana
(a) It can help to strengthen the muscles of your spine, butt, and backs of your arms as well as legs
(b) It can help to stretch your shoulders, chest, belly, and the thighs
(c) It can help to improve your posture
(d) It can help to stimulate the abdominal organs
(e) It can helps to give relief from the stress
Steps:
(a) For this pose you might need to pad your floor below the pelvis and ribs with a blanket. Then lie on the belly with the arms along the sides of the torso, palms up, forehead resting onto the floor. Turn the big toes towards each other to rotate inwardly to your thighs, and firm the buttocks so that your coccyx presses toward the pubis.
(b) While exhaling lift the head, upper torso, arms, as well as legs away from the floor. Try to rest your lower ribs, belly, and the front pelvis. Firm the buttocks and reach strongly to your legs, first through your heels to lengthen the back legs, then through the base of your big toes. Try to keep your big toes turned toward each other.
(c) Then raise the arms parallel from the floor and stretch back through the fingertips. Try to imagine that there is a weight pressing down from the back of the upper arms, and push up toward the ceiling. Press the scapulas firmly into the back.
(d) Try to gaze forward or even slightly up, be careful not to jut the chin forward and crunch the back of the neck. Try to keep the base of your skull lifted and the back of the neck long.
(e) Try to stay on this pose for 30 seconds to a minute, then release while exhaling. Take a few breaths and repeat one or two times more.
Contraindications and Cautions
Try to avoid if you have
(a) Headache
(b) A serious back injury
(c) If you have neck injuries
Yoga For Weight Gain For Females


